Previewously in this Noob Guide, we saw how to create a WordPress development environment with XAMPP. For those who have software development knowledge, that was as basic as it gets. But for non coders, it may have presented a moderate or even high level challenge. While XAMPP is versitile for many reasons, it requires some triky tweaks for working smothly with WordPress.
With that in mind, Flywheel developed Local, an aewsome software dedicated to WordPress local management. Local simplifies the process by automating all those installation steps required in the WP installation wizard. And you know what? It also packs the various WP version inside its guts.
I confess, at first I gave that bad look at Local thinking things like “this is another no code solution that promises the world but delivers nothing”. There were few times in my life I’ve been so wrong. When it comes to productivity, Local is your go to option . With a few clicks, you will have a WP local environment up and running, no need for permission or FTP settings to work.
Pros:
- Easy to download and install;
- WordPress dedicated;
- Packs different versions of PHP, MySQL, Apache Server and WordPress;
- Clean and intuitive interface;
- Automates the process, resuming it to a couple minutes;
- The blueprint functionality increases productivity a ton.
Cons:
- The automation process gives you less control over your installation than XAMPP;
- Can’t be usead as a local server management system for software other than WordPress;
Installation
Download local from the oficial website and just double click it. No command line or shortcut creation needed. The programm will launch upon completion.
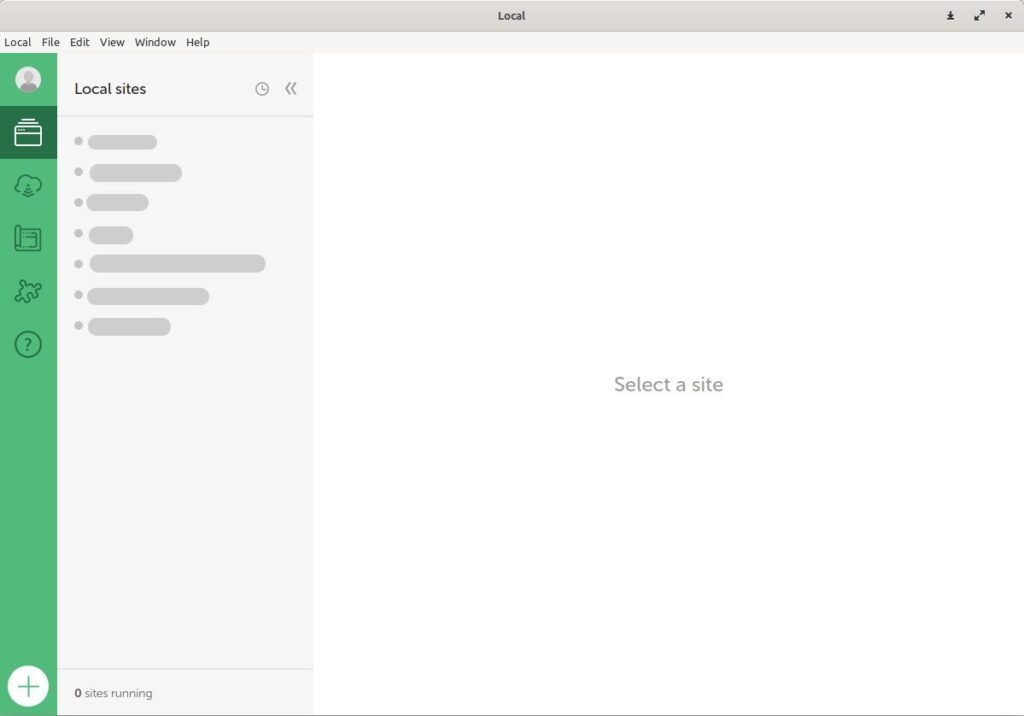
In this case, as I had Local installed, it won’t show a welcome message and quick tutorial but, as you see, there is a big round plus button at the screen’s bottom left. By clicking it you will start creating your first local site.
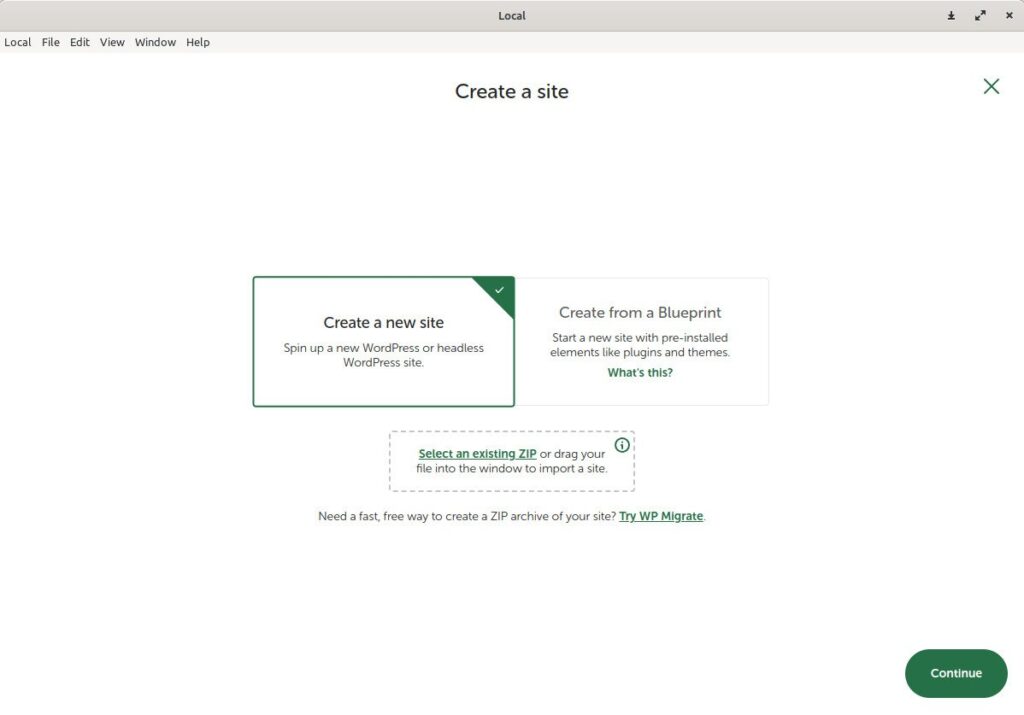
Here we have three options, two of them self explanatory. The first one will create a website from scratch, the second from a blueprint, and the third is a import option through a zip file. Before proceeding, let’s talk about the blueprint option for a bit.
After creating a website with Local, it lets you set the website as a blueprint at any time. A blueprint is a WP installation with all plugins, themes, and content defined by the developer that can be used as new website’s base.
Check this scenario. You are a WordPress developer and have three clients, all of them requesting e-commerces. So you go and create an WordPress website, install and set all plugins needed – let’s say Woocommerce, PayPal Payments, Yoast SEO, Contact Form Seven, some newsletter plugin and so on.
And thats one.
Now you have to do the same for the other two clients before start working on personalization? Not quite. If you use a bluprint, you will only have to do it once and build the e-commerces upon it without having to do all that groundwork again.
With that explained, let’s continue our website creation.
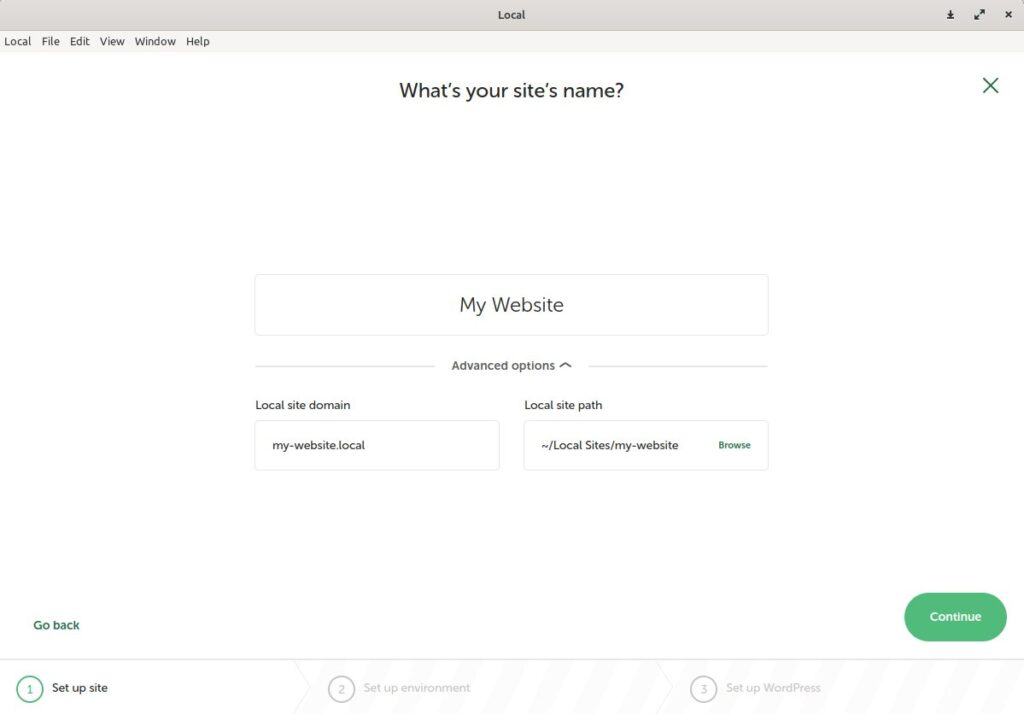
Give your website a name, choose an address and select a directory for your installation. Personally, I keep this last option as default just because I don’t see a good reason to change it. Its up to you wether or not to keep the default settings at this stage.
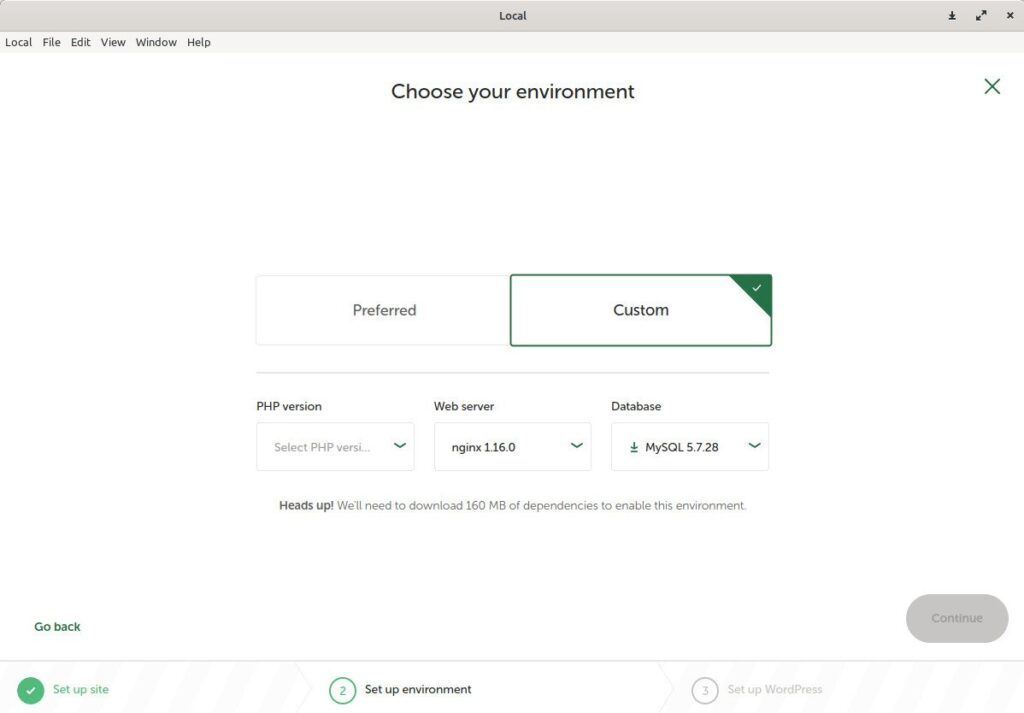
At this point, you should go with default settings if you have no web development knowledge. Why? Because the default settings will give you the latest PHP, local server and MySQL, which supports old and new features. I allways like to keep updated, so I tend to choose the default setting for this one.
But, if you are dealing with legacy code or need to use plugins and libraries that require a specific PHP or MySQL version, you can achieve that through this screen. You also can change the software versions later in the development process – a game changer in comparison to XAMPP, that works only with a specific version of PHP.
I promise to write a article about alternating PHP versions in the future, but for now let’s wrap this one.
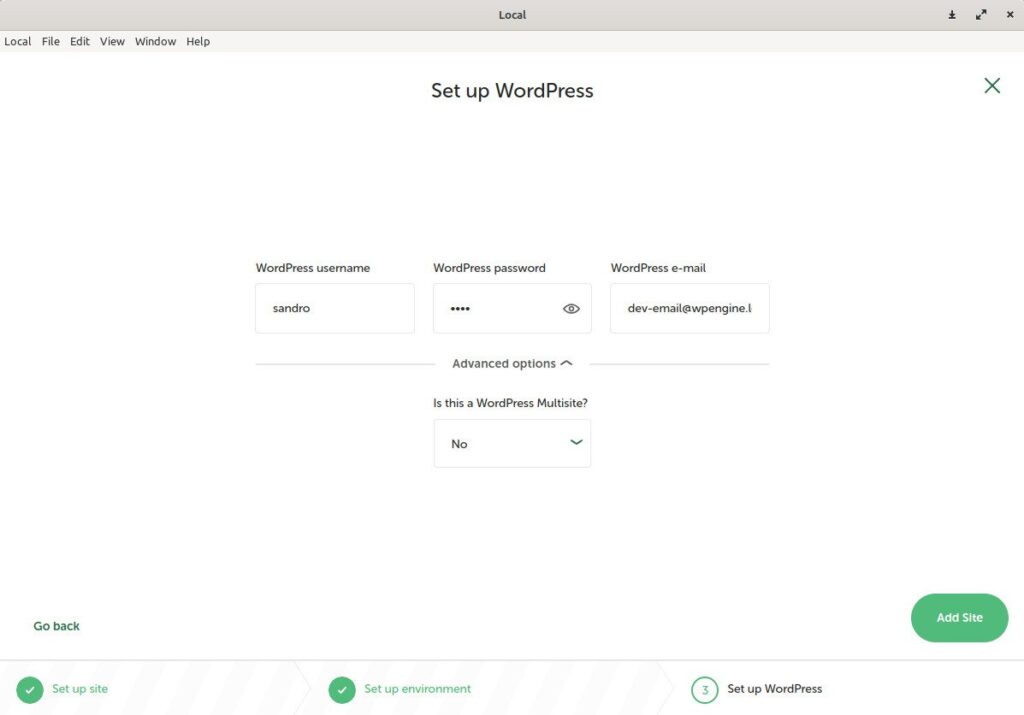
Set your admin username, password and e-mail. You can also make your site a multisite with sub local domains. This multisite issue also will be explained in the future. Now we are working with a regular installation, so just set the values (but the multisite option) as you wish and click “Add site”.
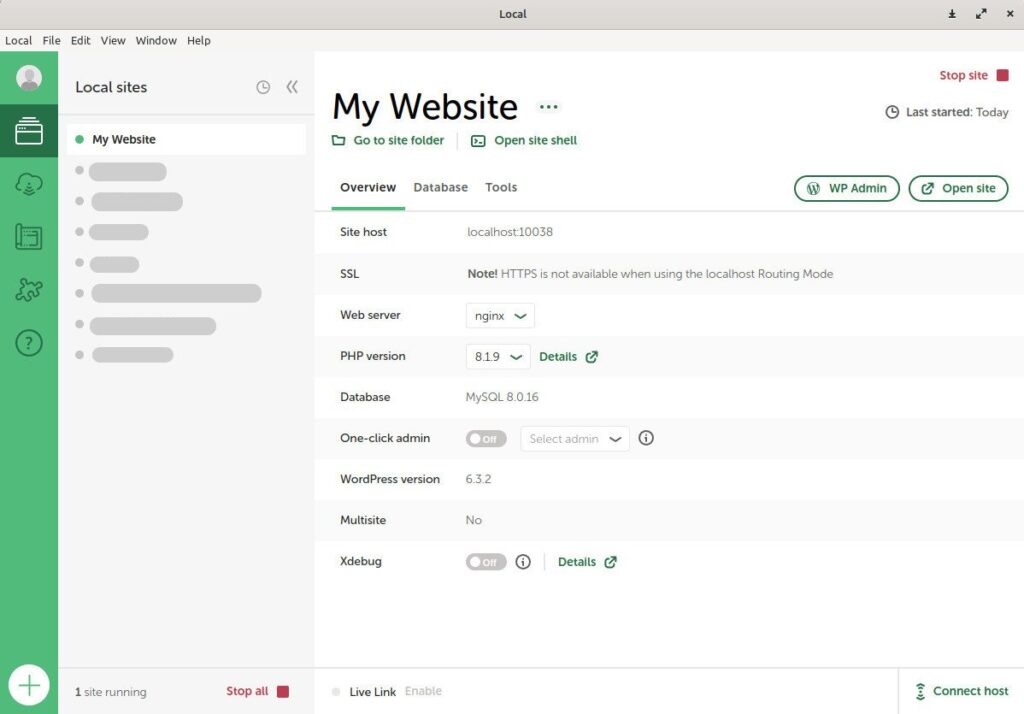
Done! Your website is up and running in your local server. Pay a little attention to the interface, there are lots of useful functionalities available in this screen. You can easily access your website directory, open a terminal inside that folder, alter software versions, go to your admin dashboard or frontend. It is really useful as a WordPress dedicated local server management system!
Conclusion
Now you know the two most used softwares for WordPress local development.
Personally, I don’t want to work with XAMPP in matters of WordPress since I tried Local. It made my life so much simpler in terms of creating and mantaining projects. And, I don’t know if you noticed, but there were no code, no trick, no permission settings for installing our website. Just a few clicks. Neat, right?
But don’t turn your backs on XAMPP just yet. If you’re still learning software development, XAMPP is a good teacher. In my early days, with no one to teach me, XAMPP required that I learned how to deal with relational databases, file permissions, FTP connections, and it gave me the first look inside WordPress. Yes, suffering is the better path to learning.
So, if you are starting now, go with XAMPP. When you have confidence in your knowledge, migrate to Local with no second thoughts and never look back – but don’t forget to be grateful to all these open source marvels.
For the next article in the Noob Guide, I will talk about the WP file structure to help you understand and manipulate it the right way.
See you then!